Friday, December 27, 2013

Last Christmas Post this year

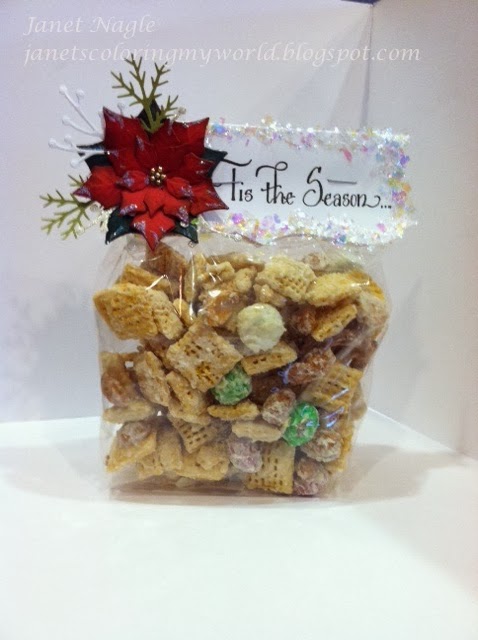
I do not know what happened this year!  It's only 6 PM on Christmas Eve and everything is done.  This is not me.  My Christmas Eve's are usually spent in a panic finishing things up and wrapping for tomorrow but I'm sitting here with nothing to do.  It is just weird!!   So I decided to post the last minute things that I finished up on Friday.  I always leave those final gift card holders, tags and candy treats till the end!!  I made Snowflake Mix and thanks to my friend Judy had two different ways of packaging it.   

The first is in a cellophane bag with a topper...


The second way is in clear, sturdy quart sized plastic containers.  The little owl is from a Whippersnapper set by Anna Wight.  I used paper piecing to give him a Christmas striped scarf!  


I always need one more gift so I have some gift card/ check holders ready.  This year I made some Z shaped cards.  I like this design because there is room for a sentiment and a little pocket that holds the gift card or check securely.  For this one I used a sentiment stamp and surrounded it with the holly and berries from the Stampin' Up set Watercolor Winter.  The snowflakes were made with a die from Impression Obsession.  It's my favorite, the snowflakes are beautiful and intricate but small enough to fit perfectly on a card!


This is what the card looks like opened.  I put a ribbon and bow on the pocket to make it look like a little gift package!


For the second card I used a funny stamp from Eat Cake Graphics.  I just love the look on the little boy's face! It makes me laugh every time I look at it!


Here is what the card looks like opened...


I hope you got all of your crafting done in time without the stress that sometimes comes with it and I hope that you had a delightful holiday!!

Thanks for visiting,
Janet
Thursday, December 12, 2013

Snowflake Easel Card

Another easel card, this time with a wintery theme!  Whoever thought this fold up is a genius! The 3-D look is so much fun and there are so many stamps and dies that can be used.  They are my new favorite (I know, I'm fickle...everything is my favorite!).  Here is one that I used for Christmas cards this year!  The snowflake is a die from The Cat's Pajamas.  You can see it here.  I cut 4 of them out of typing paper, folded them in half and glued them together.  Then I added a string using fishing line and a crimp bead.  It's very easy because the snowflake is symmetrical and lines up perfectly when you glue it together.


Here is a close-up of the snowflake, it is so pretty!


My card needed a little sparkle so I made an embellishment using white and blue card stock, vellum and Stampin' Up glitter paper punched out using a bunch of different punches.  Here's a close-up.  


It's such a busy time of year and I was in such a hurry to get my cards out that I cleaned up without writing down any of the supplies I used.  I remember that I used a My Favorite Things clear stamp to do the dotted background, the Cat's Pajamas snowflake and a Spellbinder Labels die to make the easel cut out.  If you need specifics on the punches I used or have any other questions, please contact me.

Hope you are having a fun and festive holiday season!  Thanks for stopping by!!

Janet 

Monday, December 9, 2013

Magic Slider Card - Get Well

I did it!  I finally tried making a magic slider card...and it was FUN!!  It wasn't nearly as difficult as I had imagined.  I don't know why I put off making one for so long!  I was inspired by a card I found on Pinterest made by Amy Wanford.  You can see it here!  Isn't it great...just perfect for someone who is coming back from surgery.  Problem is, I didn't have an upholstered chair stamp so I ended up finding some clip art and using my light box to trace it, then had to trace it again on acetate.  Let me tell you, it was a pain so if you want to try making this card, I'd recommend finding a chair stamp.  It will make your life SOOO much easier!  Here is how my card looks closed...


As you start pulling on the the tag...


And completely opened...


From now on I will put a little tag on top saying, "Pull" because the recipient of this card didn't realize it was magic until his Mom (my stamping friend, Kathy) told him to pull it!!

I do better at video directions than written ones so here is a link to the YouTube video that I used to help me make this card.  I sized down the measurements so the little pocket would fit on the front of a standard sized card.  l found another tutorial by Beate from Splitcoaststampers, here.  It's so good I thought you might like to take a look at this one, too!

Thanks for visiting!
Janet

Sunday, December 8, 2013

Angel Gabriel - LOTV

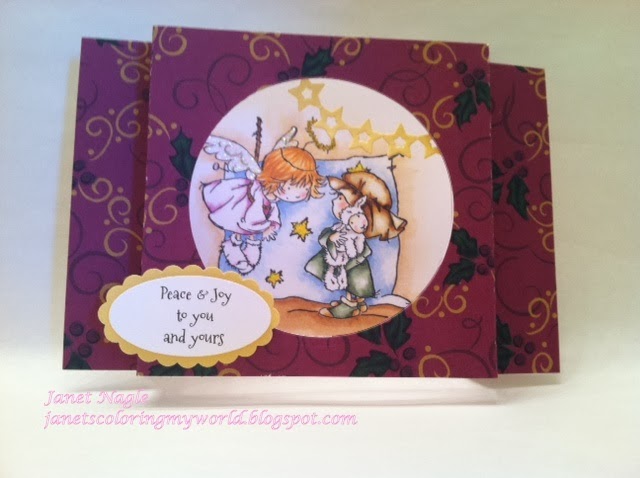
I just love shadow box cards.  I don't know for sure what it is that I like about them but they make me happy.  The Angel Gabriel stamp from Lilli of the Valley reminded me of Nativity plays and since shadow box cards look kind of like a stage, they were a perfect match!


I used Copics to color the image and then cut the pieces for the shadow box.  You can view a Splitcoaststampers video tutorial by Dawn Griffith here.  I wanted to give my "stage" a primary school feeling and I thought the star border from My Favorite Things was perfect!  I finished the card off with a little clear glitter and a computer generated sentiment.  Here's a close up of the inside of the card...


I also put a sentiment on the back of the card since this kind of card doesn't have an inside!


I hope this gave you some ideas or inspired you to make a shadow box card!  Thanks for stopping by.  

Janet


Saturday, December 7, 2013

Sentsational Season Christmas Card

Once I got started making Christmas cards it kept me really busy!  I really like this little card using Stampin Up's Sentsational Seasons Christmas tree stamp and die!


I used Stampin Up's Scalloped Square Die for the back of the card and mounted a square card on top.  Then I used two of the dies from the Windows Collection Die set to make a frame for the Christmas tree.  I really like how it looks!  I used Viva Pearl and Viva Glitter paints to add color and dimension to the tree and yellow Art Institute glitter to add sparkle to the star.  Then I  finished the card off with a little computer generated tag and some twine!


I've started using leftover decorative paper to add some color inside my cards.  It looks so much cuter and more finished...don't you think?!!

Thanks for stopping by!

Janet