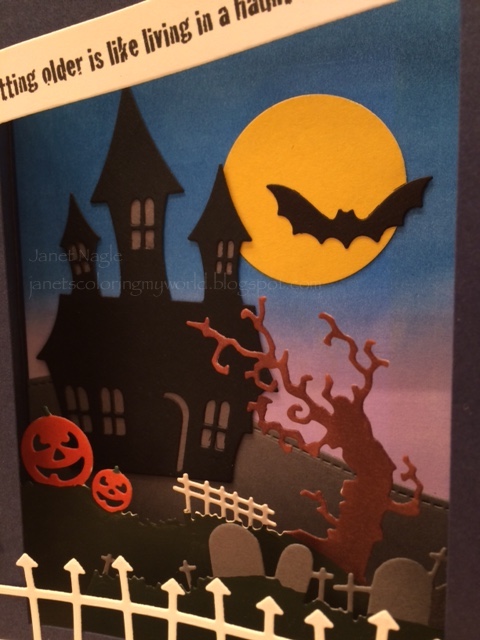
This shadow box Halloween card looks a lot more complicated than it was to make! The pieces were all made with dies except for the shadow box part. I was really happy with how spooky it looked when it was finished!
The back layer was made with pieces from MFT's Spooky House die set. I used the house, the moon and the bat. The next two layers were made using a die set from Impression Obsession called Halloween Landscapes. I die cut them in white and used Copics to color the pumpkins, tree and grave stones. I left the little fence white. I didn't want to dry out my dark green marker so I used acrylic paint to do the ground. Painting was a much quicker way to color the grass and it dried to a nice chalky finish! I used the fence die from MFT's Spooky Scene. I just looked for a link and it's been retired :(
To make the card as dimensional as possible, I glued the 2nd layer in between the 2 shadow box pieces on the left side and glued the front layer with the gravestones between the shadow box pieces on the right. Here's another close-up picture...
I saw this quote somewhere and thought it was funny and perfect for a haunted house card!! I used my computer to make the message!
Have fun tonight and be safe!
Janet
Yikes, it's been a long time since I've posted a card. I've been stamping, but usually had to keep the card secret because I didn't want the recipient to see it before they got it! I have quite a few cards that I can now post...hooray!!
I made this card to send to my son and daughter-in-law for their first anniversary! It's hard to believe that a year has already passed. We are so proud of them both and all they've accomplished in just one year!!
On this card I used the adorable Magical Dragons stamp set from My Favorite Things. The little prince and princess make the perfect couple! The colorful backdrop was made with dye inks and Clarity stencil brushes. Oh my goodness, I love these brushes!! They give better blends than anything I've ever used in all my years of stamping! The "congratulations" was made using a Papertrey Ink stamp and die set called Swooshes. It was a little tricky to position the stamped word onto the die cut word, but using the Misti it wasn't bad at all. Here is a picture of the front of the card...
I used black Staz-On ink to stamp the sword and crown onto mirror card stock and cut and pasted them on to add a little shine. The crown needed a jewel, too! The tiny hearts floating above the prince and princess were made with MFT Blueprints Tag Builder 5. I also added some sequins here and there.
Inside the card, I used my computer for the sentiment. The castle is from a retired Stampin' Up set called Dreams and Dragons. I checked and the set or the castle as a single item are available on ebay in case you need it! I colored the castle with Copics and added glitter to make it magical!
Here is a close-up of the castle.
Thanks for stopping by. I hope my card makes you want to get your stamps out and create!
Janet


